


I figured that since I’m wearing a shiny hat these days (territorial baron), I should probably look at upgrading my kit somewhat. Around Christmas, I bought myself a couple pairs of Rus pants with the intention of including them in my kit rotation. The problem? The calves on them are about 1″ too small to go around mine. They’ll fit someone else better, and will basically end up being donated to gold key (loaner garb) for my Barony since I can’t wear them comfortably.
So, what’s a Rus Viking to do?
Make them myself! As one does.
I used this post as my guide, which is a smaller version of a link/photo that Countess Gwen linked me to a couple months ago.
If you’ve never done a project with me, I’m all about efficiency while making things look good. I figured that I could try to make a pair of pants (first time EVER) and make a pattern that’s easy enough for me (and others who have less experience sewing) to replicate. So, here we are.
Supplies:
3 Yards of your Choice of Fabric (I used 52″ 100% linen for these)
3 Yards of Rope/Paracord
Measuring implement of your choice (I used a yardstick)
Sewing Machine or Needle and Thread (Use the zig-zag stitch if using a machine to help prevent fraying)
Scissors (the fabric ones, not the paper ones)
Instructions:
1. Pre-wash your fabric on hot. Dry it on hot. Seriously. Then, iron it. It’ll make measuring and cutting that much easier.
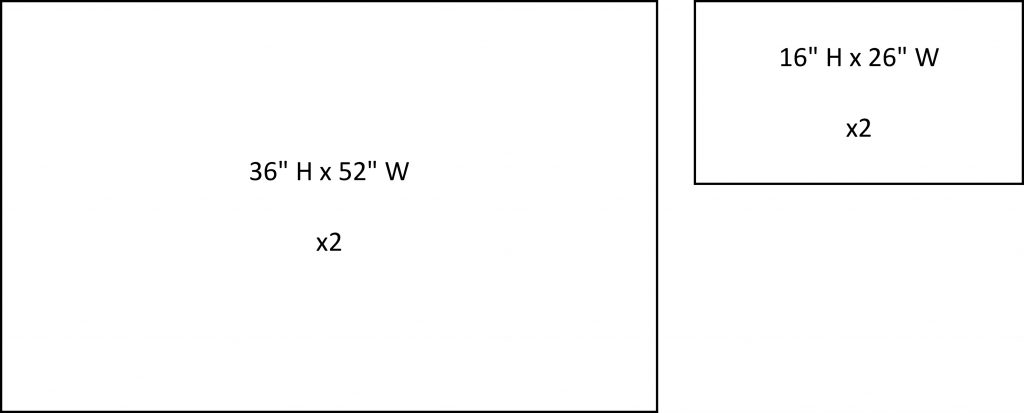
2. Once you’ve prepped your fabric, lay it out on a large flat surface. What I typically do is measure out 36″ (1 yard) on each side of the selvedge edge (the side that’s already “finished”) from the top of the fabric, then fold the fabric where that crease is created.
3. Cut the fabric at the crease and below the previously cut edge to create 3 pieces of fabric that should each be 36″ x the width of the fabric. Put two aside for right now. You’ll need them later.
4. With the remaining 36″ piece, measure 16″ from one of the cut edges and draw a line across. Cut on this line, then set aside the other 20″ piece for another project. On the 16″ piece, fold it so that the two selvedge edges are touching, then cut along the crease. Set the two pieces aside for now.
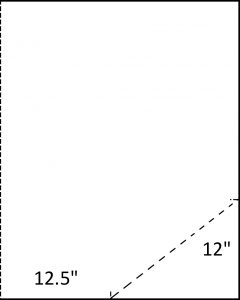
5. Take each of the remaining 36″ pieces and fold each in half, matching the selvedge edges. On each piece, on the bottom cut side near the crease, create a mark 12.5″ from the crease. Then, on the selvedge edge, create a mark 12″ from the bottom. Connect the two marks, then cut on that line to create what will end up being your blousing.
6. Once the two 36″ pieces are trimmed down, attach one of the 24″ sides to the matching side from the other piece and sew together. Leave the other set of 24″ sides open for right now.
7. Take the two 16″ x 26″ pieces and attach, then sew them to the bottom of each of the previous pieces. Finish the bottom edges on these before you sew the tube together. These will become your lower leg pieces.
8. Continue up the angled edge to the bottom of the 24″ side, and pause here. Your pants should look like this (cat not included):

9. At this point, you can finish this one of two ways:
- Leave the edge as-is and put down the rope/drawstring, then sew the drawstring into its “envelope”
- Sew down a small edge to place the cut edge inside the “envelope” for the drawstring, then put down the drawstring and create the “envelope” around it
My personal choice is the second one, which I’ll be doing for this pair of pants and others. It takes a bit longer, but the end result looks a bit more polished.
What results is a large pair of pants that will fit just about anyone and also gives one enough space so they can wear hidden leg armor if they are a rattan or rapier fighter. Paired with a pair of leg wraps, this will make for a fetching ensemble that’s just a bit more period-looking.
I plan on making a video when I do these next time from start to finish to give folks a better idea of my process because I realize that how I explained it may be a bit confusing.
I’d very much like a video the next time you make these. Because I’ve tried making Rus pants a few times (the style suits me very well, but the calves are always too small on prebought ones), and I also wind up giving them away.
That’s certainly something I can look at doing! I want to get a setup so I can record myself making things (mostly food) for tutorials.